Easy & Delicious Halloween Brownies Recipe: Spooky Treats For Your Party
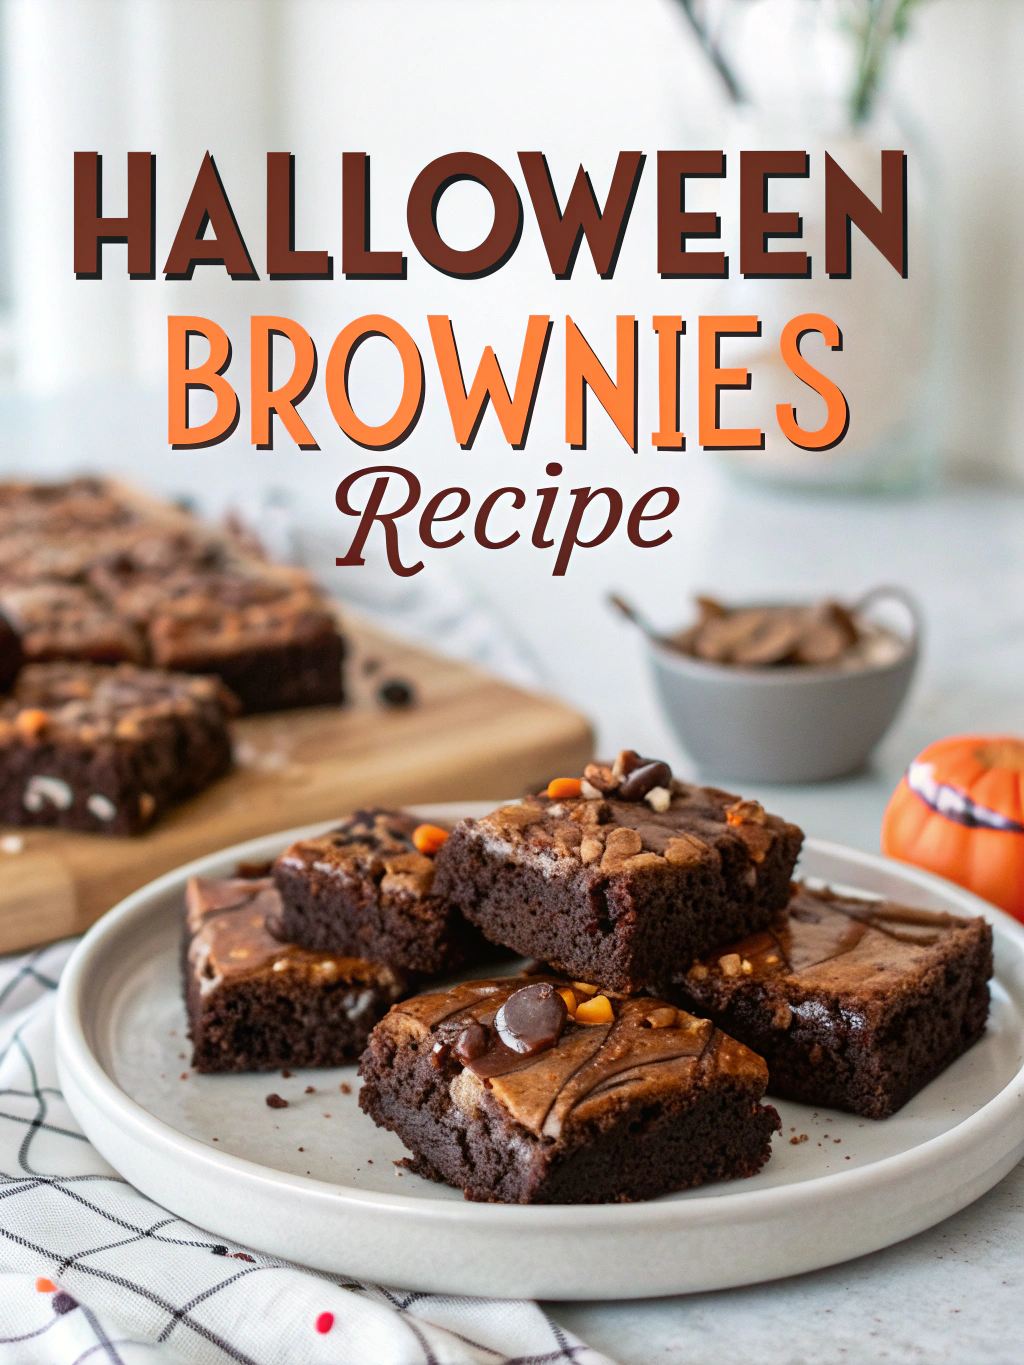
Halloween brownies recipe ideas have become a staple at my autumn gatherings, bringing both chocolate indulgence and festive fun to the table. When I was growing up, my grandmother would always say that holiday treats should be as much about the experience as the taste. These brownies honor that tradition perfectly, combining rich chocolate flavor with playful Halloween decorations that will delight guests of all ages.
Just like the mismatched spice jars in my grandmother’s kitchen, these Halloween brownies bring together familiar comfort with unexpected twists. Whether you’re planning Halloween food appetizers for a spooky party or looking for fun Halloween food to enjoy with family, these brownies strike the perfect balance between classic satisfaction and seasonal creativity.
in this recipes
Why You’ll Love These Halloween Brownies
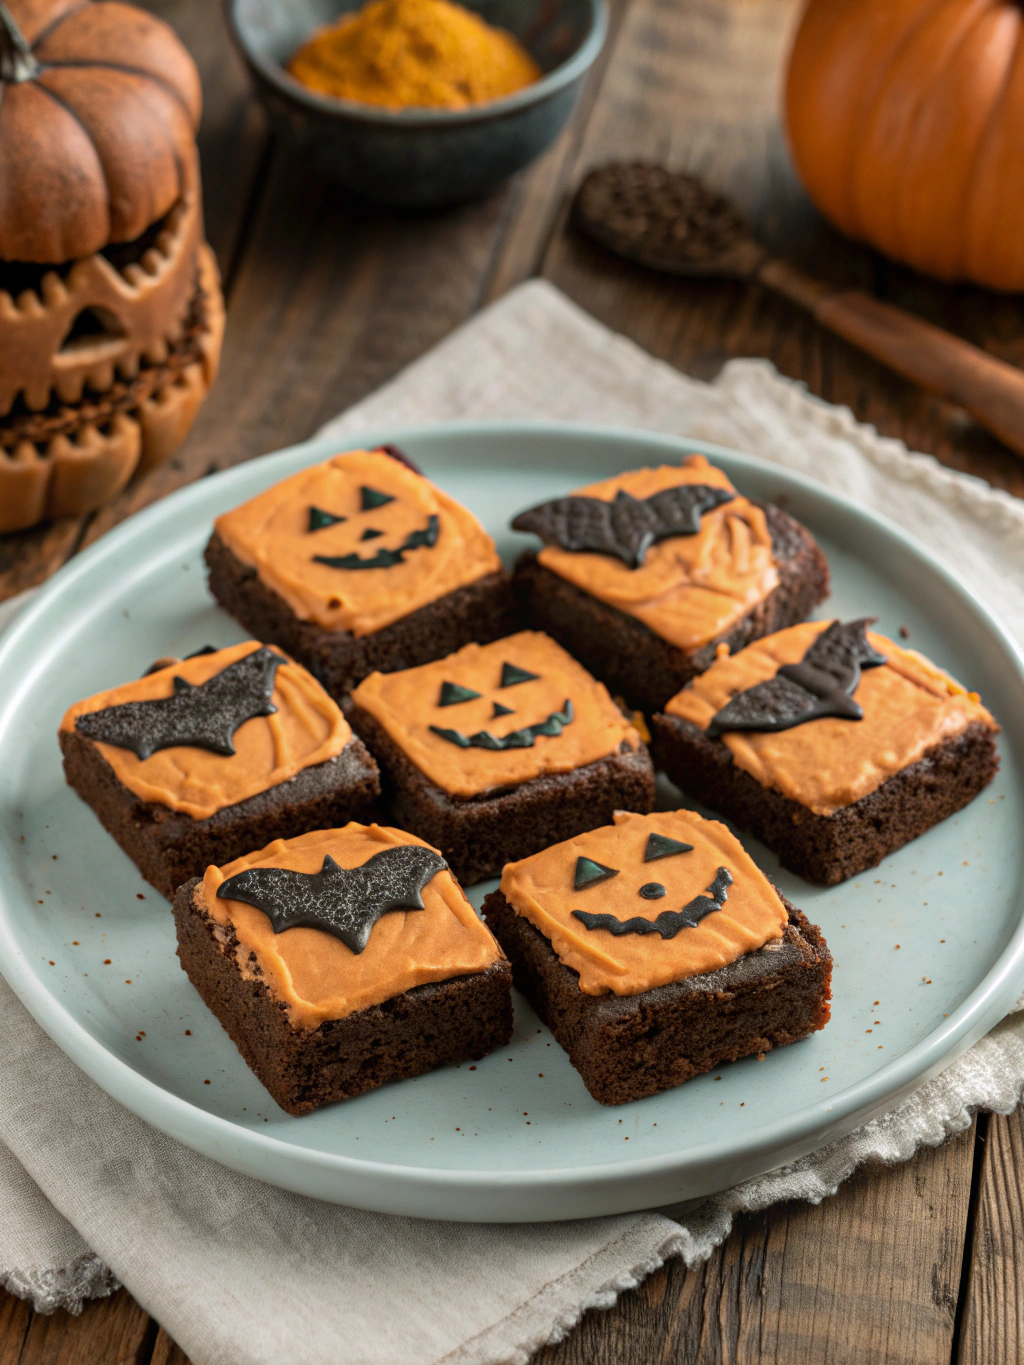
These Halloween brownies aren’t just another dessert – they’re the centerpiece your Halloween party snacks table has been missing. What makes them special is their versatility. The fudgy chocolate base provides the perfect canvas for creating everything from cute ghost faces to elaborate spider webs, letting you adjust the “spooky factor” depending on your audience.
For Halloween sleepovers, these treats are absolutely perfect. There’s something magical about a group of kids (or adults!) gathered around a plate of these decorated brownies, each choosing their favorite design before diving in. The combination of rich chocolate and festive decorations hits that sweet spot between comfort food and special occasion treat.
Parents particularly appreciate that these spooky snacks can be prepared ahead of time, allowing you to focus on other aspects of your Halloween festivities. And unlike some complicated Halloween food treats that look better than they taste, these brownies deliver on both visual appeal and delicious flavor.
Ingredients You’ll Need
For the Brownie Base:
- 1 cup unsalted butter (2 sticks)
- 2 cups granulated sugar
- 4 large eggs, at room temperature
- 1 tablespoon vanilla extract
- 1 cup all-purpose flour
- 1 cup unsweetened cocoa powder
- 1/2 teaspoon salt
- 1 cup semi-sweet chocolate chips
For Halloween Decorations:
- 2 cups powdered sugar
- 3-4 tablespoons milk
- Food coloring (orange, black, green, purple)
- Candy eyes
- Halloween sprinkles
- Mini chocolate chips
- Halloween candy pieces (optional)
- Plastic spiders (for decoration only, remove before eating)
Special Equipment:
- 9×13 inch baking pan
- Parchment paper
- Mixing bowls
- Piping bags or zip-top bags for decorating
- Toothpicks for creating designs
How to Make Halloween Brownies
Preparing the Perfect Brownie Base
Preheat your oven to 350°F (175°C) and line your baking pan with parchment paper, leaving some overhang for easy removal.
In a microwave-safe bowl or using a double boiler, melt the butter. Add the sugar and stir until combined, then let cool slightly.
Whisk in the eggs one at a time, then add the vanilla extract and mix until the batter looks glossy.
In a separate bowl, whisk together the flour, cocoa powder, and salt.
Gently fold the dry ingredients into the wet mixture until just combined – don’t overmix!
Fold in the chocolate chips and pour the batter into your prepared pan, spreading it evenly.
Bake for 25-30 minutes, or until a toothpick inserted in the center comes out with a few moist crumbs (not wet batter).
Allow the brownies to cool completely in the pan on a wire rack before decorating – this is crucial for clean decorating!
Creating Spooky Decorations
Once brownies are completely cool, lift them out using the parchment paper and place on a cutting board.
For clean slices, cut the brownies with a sharp knife wiped clean between cuts. You can cut them into squares, rectangles, or even use Halloween cookie cutters for shaped brownies.
Prepare the icing by whisking powdered sugar with milk until smooth. Divide into separate bowls and add food coloring as desired.
Transfer colored icing to piping bags or zip-top bags with a small corner snipped off.
Decorate your brownies with Halloween designs like:
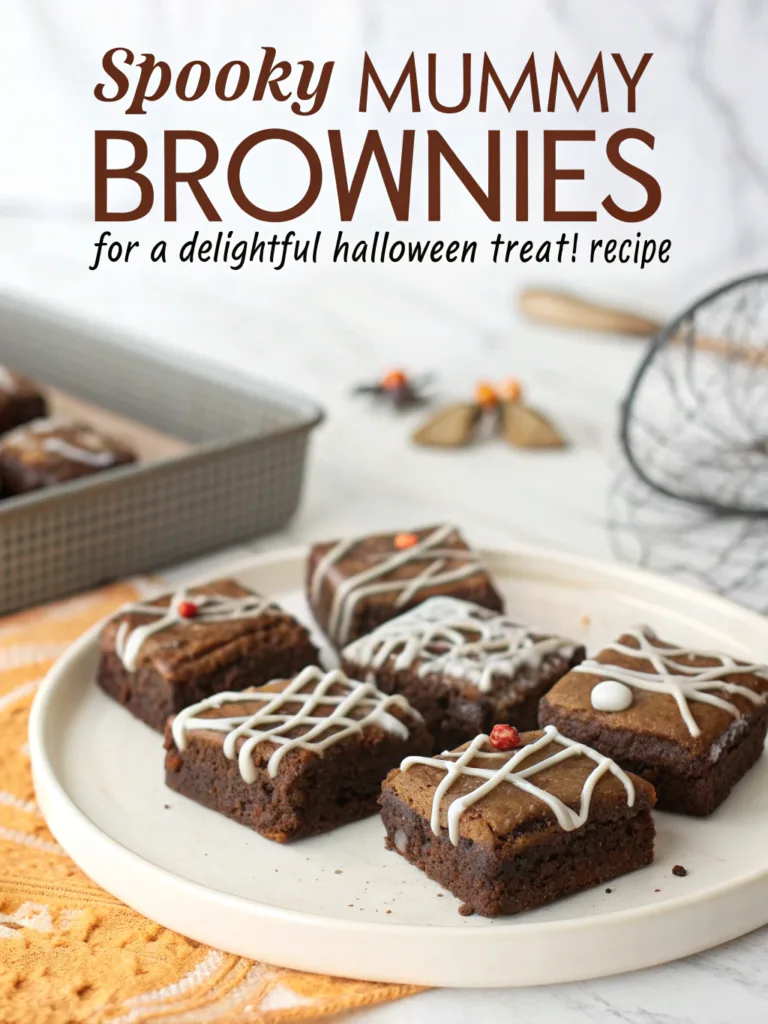
- Ghost faces using white icing and mini chocolate chips for eyes
- Orange icing with black spiderweb details
- Monster faces with candy eyes and colored icing
- Drizzled “blood” using red icing
- Frankenstein monsters with green icing, chocolate hair, and candy eyes
- Allow decorations to set for at least 30 minutes before serving as part of your spooky food spread.
Storage & Reheating Tips
These Halloween brownies maintain their best quality when stored properly. For same-day serving, simply keep them covered at room temperature. If you’re making them 1-2 days ahead, store in an airtight container with wax paper between layers to prevent decorations from sticking.
For longer storage, these fun Halloween food treats freeze beautifully before decorating. Wrap the undecorated brownie slab tightly in plastic wrap, then aluminum foil, and freeze for up to 3 months. Thaw overnight in the refrigerator, then bring to room temperature before decorating.
If you have leftover decorated brownies, they’ll keep in the refrigerator for up to 5 days. Let them come to room temperature before serving for the best flavor and texture. While you can microwave individual brownies for 10-15 seconds to warm them, note that this will melt the decorations.
FOR MORE RECIPES FOLLOW ME IN FACEBOOK AND PINTEREST
FAQs About Halloween Brownies
Can I use a boxed brownie mix instead of making them from scratch?
Absolutely! While homemade brownies have a richer flavor, a quality boxed mix works perfectly for this recipe. Just prepare according to package directions, then follow our decorating instructions.
How do I keep my decorations from bleeding into each other?
The key is waiting until your brownies are completely cool and using icing that’s not too runny. If adding multiple colors that touch, let each color set for about 15 minutes before adding the next.
Can I make these Halloween brownies allergen-friendly?
Yes! For gluten-free Halloween brownies, substitute the all-purpose flour with a 1:1 gluten-free baking flour. For dairy-free versions, use plant-based butter and milk alternatives in both the brownies and decorations.
What’s the best way to transport these to a Halloween party?
Place decorated brownies in a single layer in a container with a tight-fitting lid. If you need to stack them, place a sheet of parchment paper between layers and transport them in a cooler to prevent melting.
How can I make these Halloween brownies even spookier?
Try adding food-safe activated charcoal to create intense black decorations, or incorporate Halloween-themed mix-ins like orange-colored chips or crushed Oreos with orange filling.
These Halloween brownies recipe creations are more than just spooky snacks – they’re a way to create memories around your Halloween food treats tradition. Just like my grandmother taught me that cooking is about heart, these brownies bring together the joy of baking with the playfulness of Halloween decorating.
Halloween brownies recipe ideas have become a staple at my autumn gatherings, bringing both chocolate indulgence and festive fun to the table. When I was growing up, my grandmother would always say that holiday treats should be as much about the experience as the taste. These brownies honor that tradition perfectly, combining rich chocolate flavor with playful Halloween decorations that will delight guests of all ages.
Just like the mismatched spice jars in my grandmother’s kitchen, these Halloween brownies bring together familiar comfort with unexpected twists. Whether you’re planning Halloween food appetizers for a spooky party or looking for fun Halloween food to enjoy with family, these brownies strike the perfect balance between classic satisfaction and seasonal creativity.
in this recipes
Why You’ll Love These Halloween Brownies
These Halloween brownies aren’t just another dessert – they’re the centerpiece your Halloween party snacks table has been missing. What makes them special is their versatility. The fudgy chocolate base provides the perfect canvas for creating everything from cute ghost faces to elaborate spider webs, letting you adjust the “spooky factor” depending on your audience.
For Halloween sleepovers, these treats are absolutely perfect. There’s something magical about a group of kids (or adults!) gathered around a plate of these decorated brownies, each choosing their favorite design before diving in. The combination of rich chocolate and festive decorations hits that sweet spot between comfort food and special occasion treat.
Parents particularly appreciate that these spooky snacks can be prepared ahead of time, allowing you to focus on other aspects of your Halloween festivities. And unlike some complicated Halloween food treats that look better than they taste, these brownies deliver on both visual appeal and delicious flavor.
Ingredients You’ll Need

For the Brownie Base:
- 1 cup unsalted butter (2 sticks)
- 2 cups granulated sugar
- 4 large eggs, at room temperature
- 1 tablespoon vanilla extract
- 1 cup all-purpose flour
- 1 cup unsweetened cocoa powder
- 1/2 teaspoon salt
- 1 cup semi-sweet chocolate chips
For Halloween Decorations:
- 2 cups powdered sugar
- 3-4 tablespoons milk
- Food coloring (orange, black, green, purple)
- Candy eyes
- Halloween sprinkles
- Mini chocolate chips
- Halloween candy pieces (optional)
- Plastic spiders (for decoration only, remove before eating)
Special Equipment:
- 9×13 inch baking pan
- Parchment paper
- Mixing bowls
- Piping bags or zip-top bags for decorating
- Toothpicks for creating designs
How to Make Halloween Brownies
Preparing the Perfect Brownie Base
Preheat your oven to 350°F (175°C) and line your baking pan with parchment paper, leaving some overhang for easy removal.
In a microwave-safe bowl or using a double boiler, melt the butter. Add the sugar and stir until combined, then let cool slightly.
Whisk in the eggs one at a time, then add the vanilla extract and mix until the batter looks glossy.
In a separate bowl, whisk together the flour, cocoa powder, and salt.
Gently fold the dry ingredients into the wet mixture until just combined – don’t overmix!
Fold in the chocolate chips and pour the batter into your prepared pan, spreading it evenly.
Bake for 25-30 minutes, or until a toothpick inserted in the center comes out with a few moist crumbs (not wet batter).
Allow the brownies to cool completely in the pan on a wire rack before decorating – this is crucial for clean decorating!
Creating Spooky Decorations
Once brownies are completely cool, lift them out using the parchment paper and place on a cutting board.
For clean slices, cut the brownies with a sharp knife wiped clean between cuts. You can cut them into squares, rectangles, or even use Halloween cookie cutters for shaped brownies.
Prepare the icing by whisking powdered sugar with milk until smooth. Divide into separate bowls and add food coloring as desired.
Transfer colored icing to piping bags or zip-top bags with a small corner snipped off.
Decorate your brownies with Halloween designs like:
- Ghost faces using white icing and mini chocolate chips for eyes
- Orange icing with black spiderweb details
- Monster faces with candy eyes and colored icing
- Drizzled “blood” using red icing
- Frankenstein monsters with green icing, chocolate hair, and candy eyes
- Allow decorations to set for at least 30 minutes before serving as part of your spooky food spread.
Storage & Reheating Tips
These Halloween brownies maintain their best quality when stored properly. For same-day serving, simply keep them covered at room temperature. If you’re making them 1-2 days ahead, store in an airtight container with wax paper between layers to prevent decorations from sticking.
For longer storage, these fun Halloween food treats freeze beautifully before decorating. Wrap the undecorated brownie slab tightly in plastic wrap, then aluminum foil, and freeze for up to 3 months. Thaw overnight in the refrigerator, then bring to room temperature before decorating.
If you have leftover decorated brownies, they’ll keep in the refrigerator for up to 5 days. Let them come to room temperature before serving for the best flavor and texture. While you can microwave individual brownies for 10-15 seconds to warm them, note that this will melt the decorations.
FOR MORE RECIPES FOLLOW ME IN FACEBOOK AND PINTEREST
FAQs About Halloween Brownies
Can I use a boxed brownie mix instead of making them from scratch?
Absolutely! While homemade brownies have a richer flavor, a quality boxed mix works perfectly for this recipe. Just prepare according to package directions, then follow our decorating instructions.
How do I keep my decorations from bleeding into each other?
The key is waiting until your brownies are completely cool and using icing that’s not too runny. If adding multiple colors that touch, let each color set for about 15 minutes before adding the next.
Can I make these Halloween brownies allergen-friendly?
Yes! For gluten-free Halloween brownies, substitute the all-purpose flour with a 1:1 gluten-free baking flour. For dairy-free versions, use plant-based butter and milk alternatives in both the brownies and decorations.
What’s the best way to transport these to a Halloween party?
Place decorated brownies in a single layer in a container with a tight-fitting lid. If you need to stack them, place a sheet of parchment paper between layers and transport them in a cooler to prevent melting.
How can I make these Halloween brownies even spookier?
Try adding food-safe activated charcoal to create intense black decorations, or incorporate Halloween-themed mix-ins like orange-colored chips or crushed Oreos with orange filling.
These Halloween brownies recipe creations are more than just spooky snacks – they’re a way to create memories around your Halloween food treats tradition. Just like my grandmother taught me that cooking is about heart, these brownies bring together the joy of baking with the playfulness of Halloween decorating.

